Main Window
Transformations™ has two main functionalities: teaching and testing students’ knowledge of transformations. Upon starting the application, you will be automatically sent to the teaching zone. Here you can spawn a variety of shapes and perform a variety of transformation upon them.
Program Layout Overview
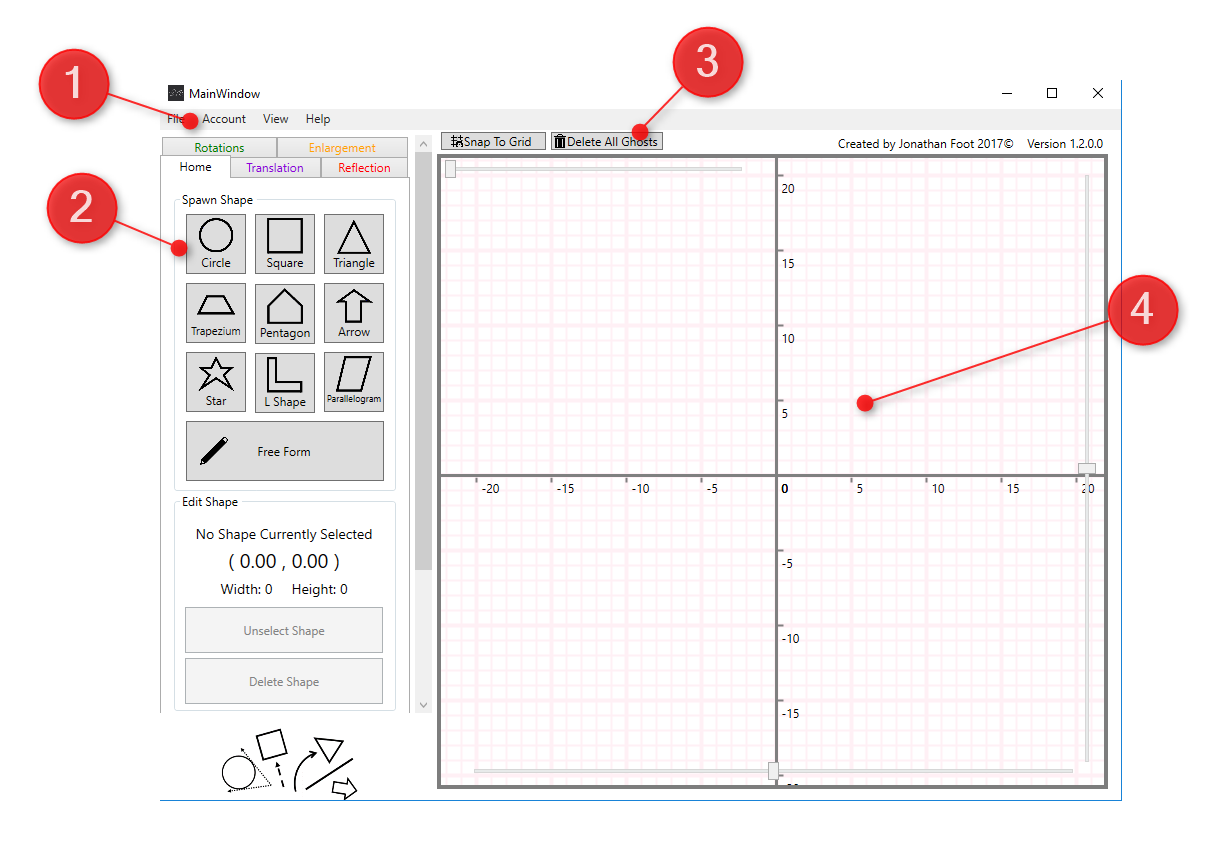
The main window is split into four key sections, as labelled above.
- Menu Bar
- Tab Control Window
- Toolbar
- Grid
1. Menu Bar
The menu bar is in the top left of the application, it is grouped into “File”, “Account”, “View” and “Help”. This should be familiar to most other Windows Applications.
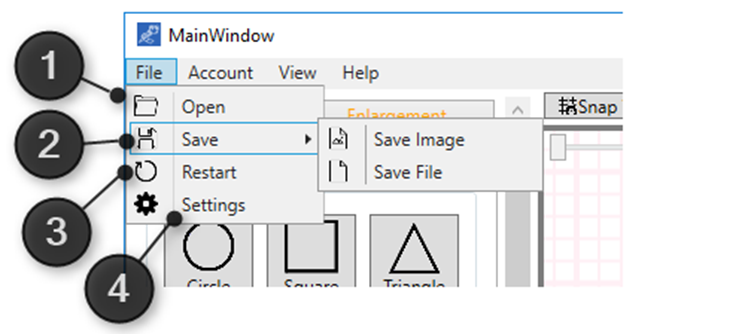
File- Under the file menu are options to Open, Save, Restart and Settings.
- Open allows you to open .shape files into the program.
- Save lets you either save a .PNG (image file) of your current viewport or save all the currently drawn shapes in a .shape file. Please note, ghost shapes will not save in the .shape file
- Restart will restart the application.
- Settings will open the settings window and is described in detail in the "Getting Started" section.
Account – The account menu will give you access to your student or teacher account, for more detail see the "Accounts" section.
View- Under the view settings you can toggle on and off the grid labels and reset the axis back to the centre position of the screen.
Help- help is a general-purpose menu allowing you to get details about the application, check for updates, report a bug and to give feedback.
2. Tab Control Window
The tab control window is located on the left-hand side of the application, here you can spawn in shapes and then perform transformations on to them. The tab control window is split up into five tabs: home, rotation, reflection, enlargement, and translation. Below outlines the home tab, for a detailed breakdown of performing the transformations see the contents page.
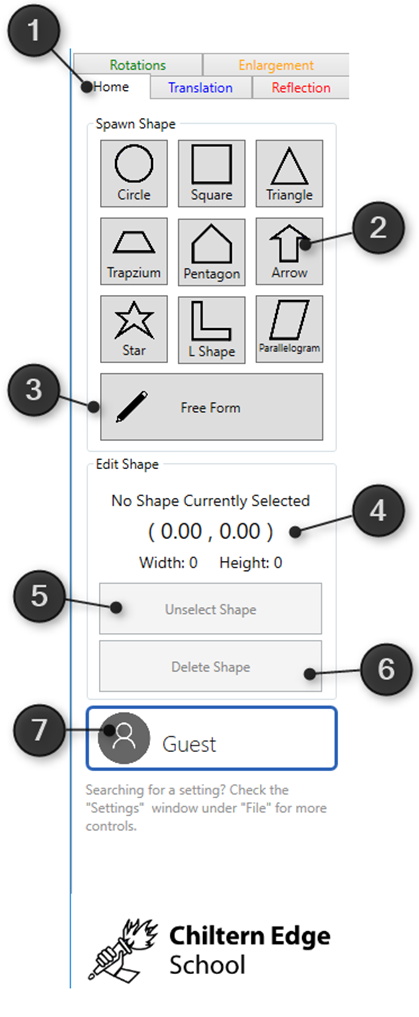
- Tab controller, here you select the tab you wish to view; in this instance “Home”. Tabs are colour coordinated to match their ghost’s colours.
- Here you can spawn in a shape, from nine pre-defined shapes. Simply click on one of the buttons and a shape will be produced on the grid at (0, 0)
- Here you can draw your own shapes. To do so click on the button. Your mouse cursor should change to a cross hair; you may now start clicking on to the grid, creating vertices. Once you have made all your points press the Esc key to join the final points and create your shape.
- Here you can view the shapes current properties, including its name, current coordinates, width, and height. It calculates its current coordinate position by using the bottom left location or the first produced point on a free-form polygon.
- Here you can un-select any currently selected shape
- Here you can delete any currently selected shape from the grid. You may also press the Delete key.
- Here you can view the currently logged in User, if no User is logged in you will be assigned a Guest account. If you cannot see this section you may need to scroll downwards using the bar to the right. To learn more about accounts please view the"Accounts" section.
3. ToolBar
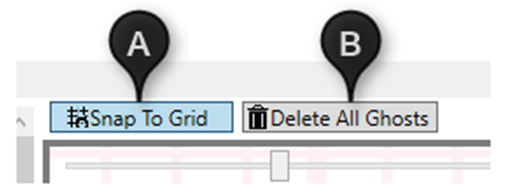
Located above the grid is the toolbar, here you can perform actions on the grid:
- Here you can toggle on and off “snapping” to grid. Turning the button on will give all the shapes an integer coordinate.
- Here you can delete all the ghost(s) on the grid. This will delete all ghost(s) regardless of their transformation type.
							:     Note

							A ghost shape is a new transformed shape from some original shape and is normally indicated by its translucency (if not in low performance mode). For more key word definitions look at the
							Glossary
4. Grid
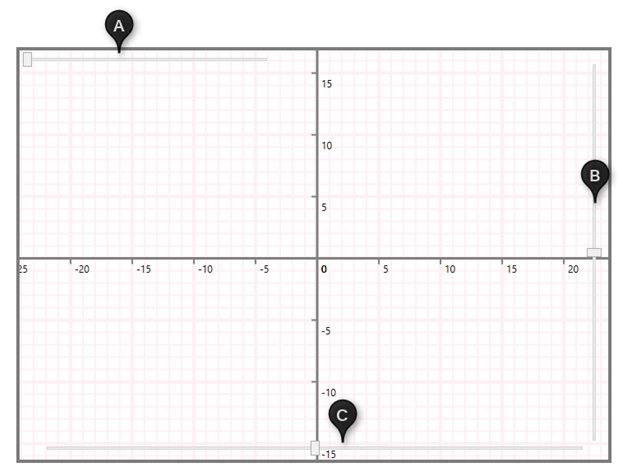
- Here you can change the scale/ zoom on the grid. Simply drag the slider left (out) or right (in).
- Here you can change the Y displacement of the grid, drag the slider bar in the direction of movement.
- Here you can change the X displacement of the grid.
Alternatively, you can pan around the grid by holding down the ctrl button and clicking and dragging on the grid; your mouse cursor should change to that of a hand. You can also zoom in and out by using the mouse scroll wheel.